May We Interest You In…….Intarsia?
My Sister Knits has a charming sample of the Bliss-Bloss Shawl, designed by Ambah O’Brien. I was looking at it, thinking that I could never make it because it involved intarsia colorwork. Then I thought, “why not?”. Years ago I made a baby blanket that used a bit of intarsia andI wasn’t 100% pleased with the result. Rather than learning more about it, I’ve avoided it and how silly is that?
It occurred to me that I may not be the only person avoiding intarsia so I did a deep dive into YouTube tutorials and I’ll share what I found. Remember that there can be different ways of doing almost anything in knitting and I found that to be true for intarsia also! If any of you reading this are experienced intarsia knitters and notice something glaringly wrong, please let us know and I’ll correct it in next week’s post.

This is the middle size with 3 flowers. The smallest has 1 flower and the larger has 5 flowers.
First, a bit more about the Bliss-Bloss Shawl. It’s knit tip to tip, has 3 sizes, the background is garter stitch, and it has an I-cord edging. When it comes to binding off, you only have 5 stitches to work!
When you try it on, you’ll notice how light and airy it feels. That’s because it’s made with CaMaRose Snefnug! The background is a solid color and the flowers are made with Snefnug’s special Watercolor colorways. It makes you feel as if you’re creating an Impressionist inspired shawl!

This is the wrong side of the shawl.
On to how to work this technique……
I checked out a number of video tutorials and found three to be particularly thorough. There’s a 50 minute one from Nimble Needles that is well worth your time, also a blog post from him on how to calculate the amount of yarn you’ll need for each section of color. There are two from Roxanne Richardson: one on the basics and one on yarn management and estimation. You’ll learn a little something different in each of these.
Intarsia is worked in stockinette stitch so there are only knits and purls and the technique is the same for either stitch.
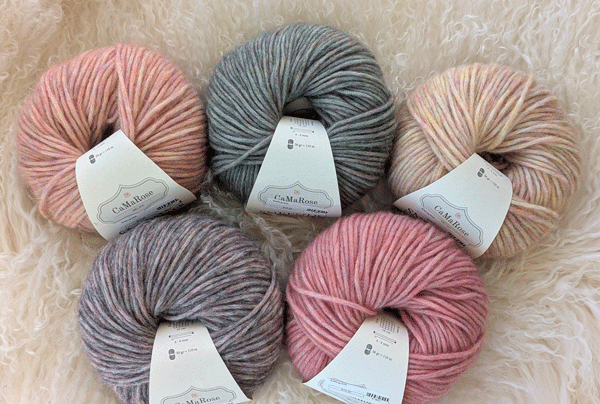
Choose the background color that you want and then have fun with the flower colors! The two watercolors in this photo are Birkeskov ( birch forest) on the left and Aftensol (evening sun) on the right.
It’s a way of basically adding a picture to your knitting. In our case, it’s flowers. It might be an animal on a child’s sweater or putting a design on a hat, there are endless possibilities. It’s usually knit flat, as knitting it in the round is a completely different process. You want a relatively tight knit fabric for neat changes between colors as you don’t want anything to show through when it’s gently stretched. Solid densely spun yarn is a good choice. q
Knit as close to the needle tips as you can, using needles with long tips for the best results. This avoids stretching out the previous stitch more than necessary and is most helpful when changing colors. When you transition from one color to the next, tighten up the last stitch in the old color with a gentle tug.
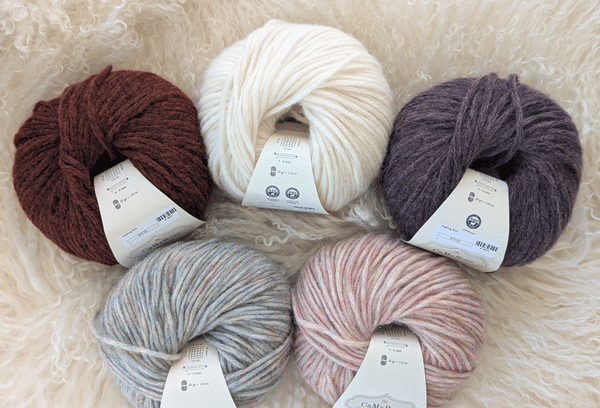
Clockwise from top left: Morgengry (dawn), Skovbund (forest floor), Fuldmane (full moon), Celosia (it’s a plant), and Bjergtop (mountain top).
There’s a clever trick for keeping your yarns untangled. When you’re done with a RS row, turn or rotate your needle clockwise. This will tangle them just a bit. Then, when you’re done with a WS row, turn them counter-clockwise and just like that your yarns should be untwisted. Or you can do it vice versa!
Roxanne and Norman have different ways of joining a new yarn and of trapping the old yarn when changing to a new color. One wraps once and the other wraps twice. The way they calculate the yarn you’ll need is also a bit different. Roxanne shows more ways to manage your yarn.
Now that I’ve found these videos, I’m actually eager to try intarsia again and I hope you will be, too!
Happy knitting,
