MSK KAL Pattern Notes
For those of you who are planning to join our Garter Stitch Shawl KAL that starts Tuesday, April 21st, I have created some helpful notes for you!
First, an easy way to do the Garter Tab cast on!
As the pattern says, cast on 5 stitches. As soon as you cast on these stitches, before you knit a row, put a locking stitch marker in each cast on stitch. This will make picking up those stitches a breeze!
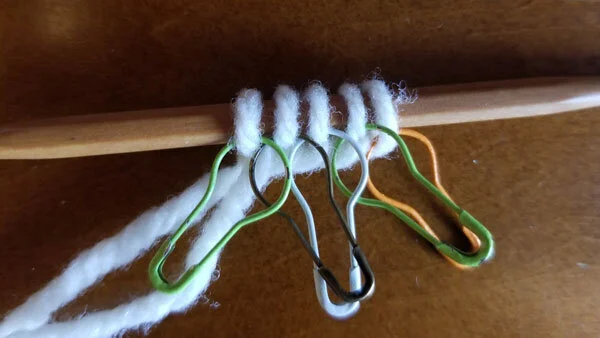
Put the marker in the stitches, not on your needle!
The pattern says to knit 18 rows. It may be easier to think in terms of ‘knit 9 ridges’ as they are easier to count.
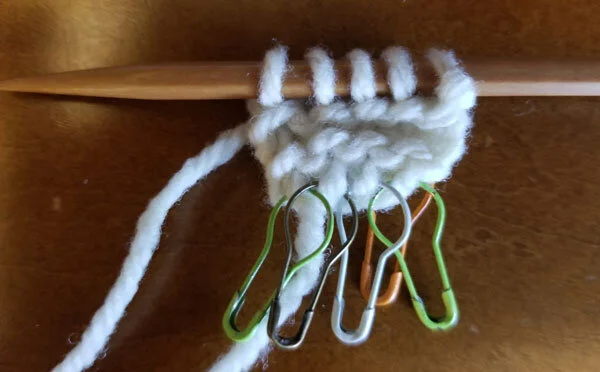
This is what your work will look like after knitting a few rows.
After the 18th row, or 9th ridge, you will turn your work to pick up stitches along the long edge. Stephen West says to just pick up as best you can! The easiest way to do this, especially with the yarn we’re using, is to get a crochet hook or your ‘Handi Tool’. Insert your hook through the opening and draw through a stitch. You may have to tug at your fabric a bit to easily see the holes but they are there! You can put several stitches on your hook and then transfer them to your knitting needle if you like, rather than picking them up and transferring them one at a time.
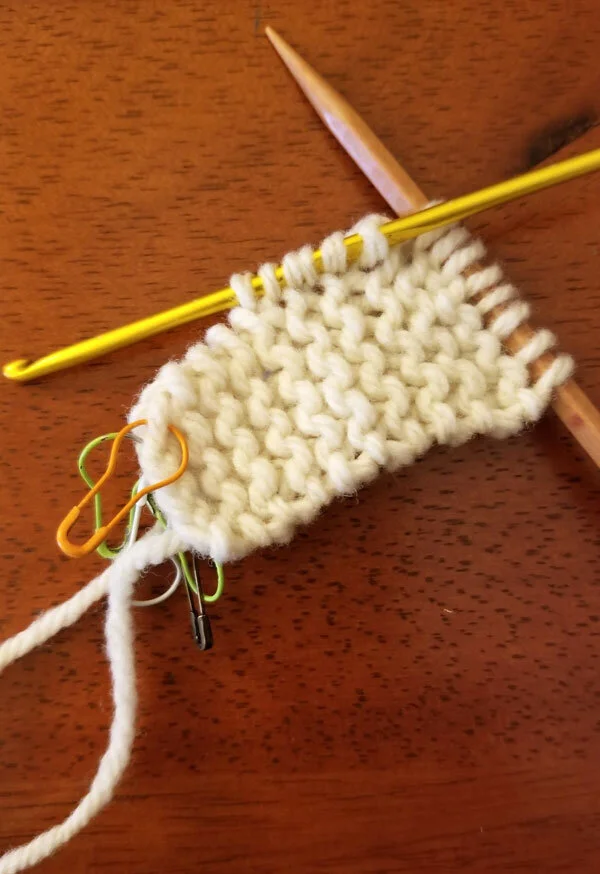
When you’ve finished picking up your 17 stitches you’ll be at your cast on edge.
This is when your stitch markers will be a life saver! Starting with the one nearest your needle, pull it out to create a nice easy place to insert your other needle and knit a stitch. Be sure to knit a stitch. If you just pick up without knitting, your yarn won’t be in the correct place! I suggest leaving your marker in until you’ve knit the stitch! Do this with all 5 markers. Then take a deep breath and relax because you’re done with the hardest part of this shawl!!
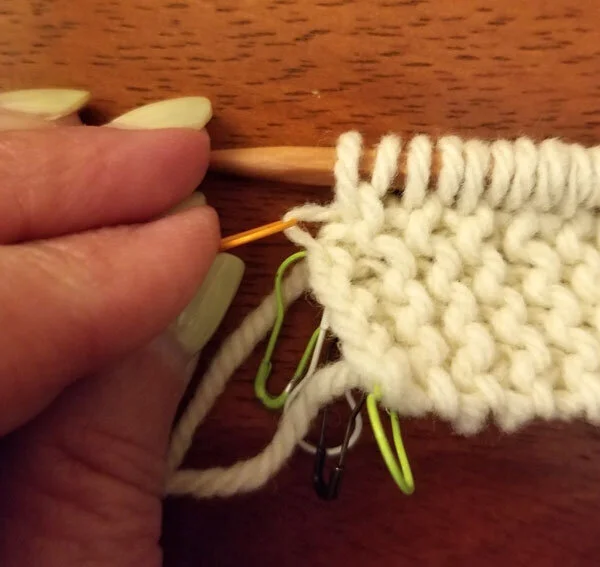
Pull your marker out to easily create an opening for your needle!
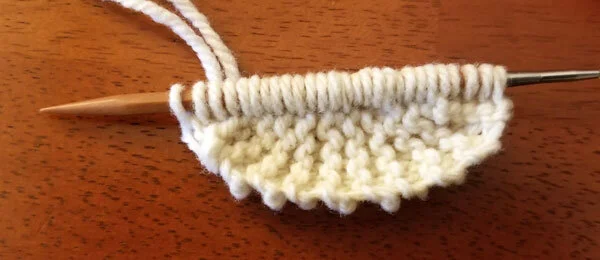
This is how the finished Garter Tab cast on looks.
Pattern Notes
I have a few notations that may make reading this pattern easier. I made notes of where I was a bit confused (COVID brain perhaps?) assuming that I wouldn’t be the only one!
Row 4: change ‘move’ marker to ‘slip’ marker (you’ll need 4 markers)
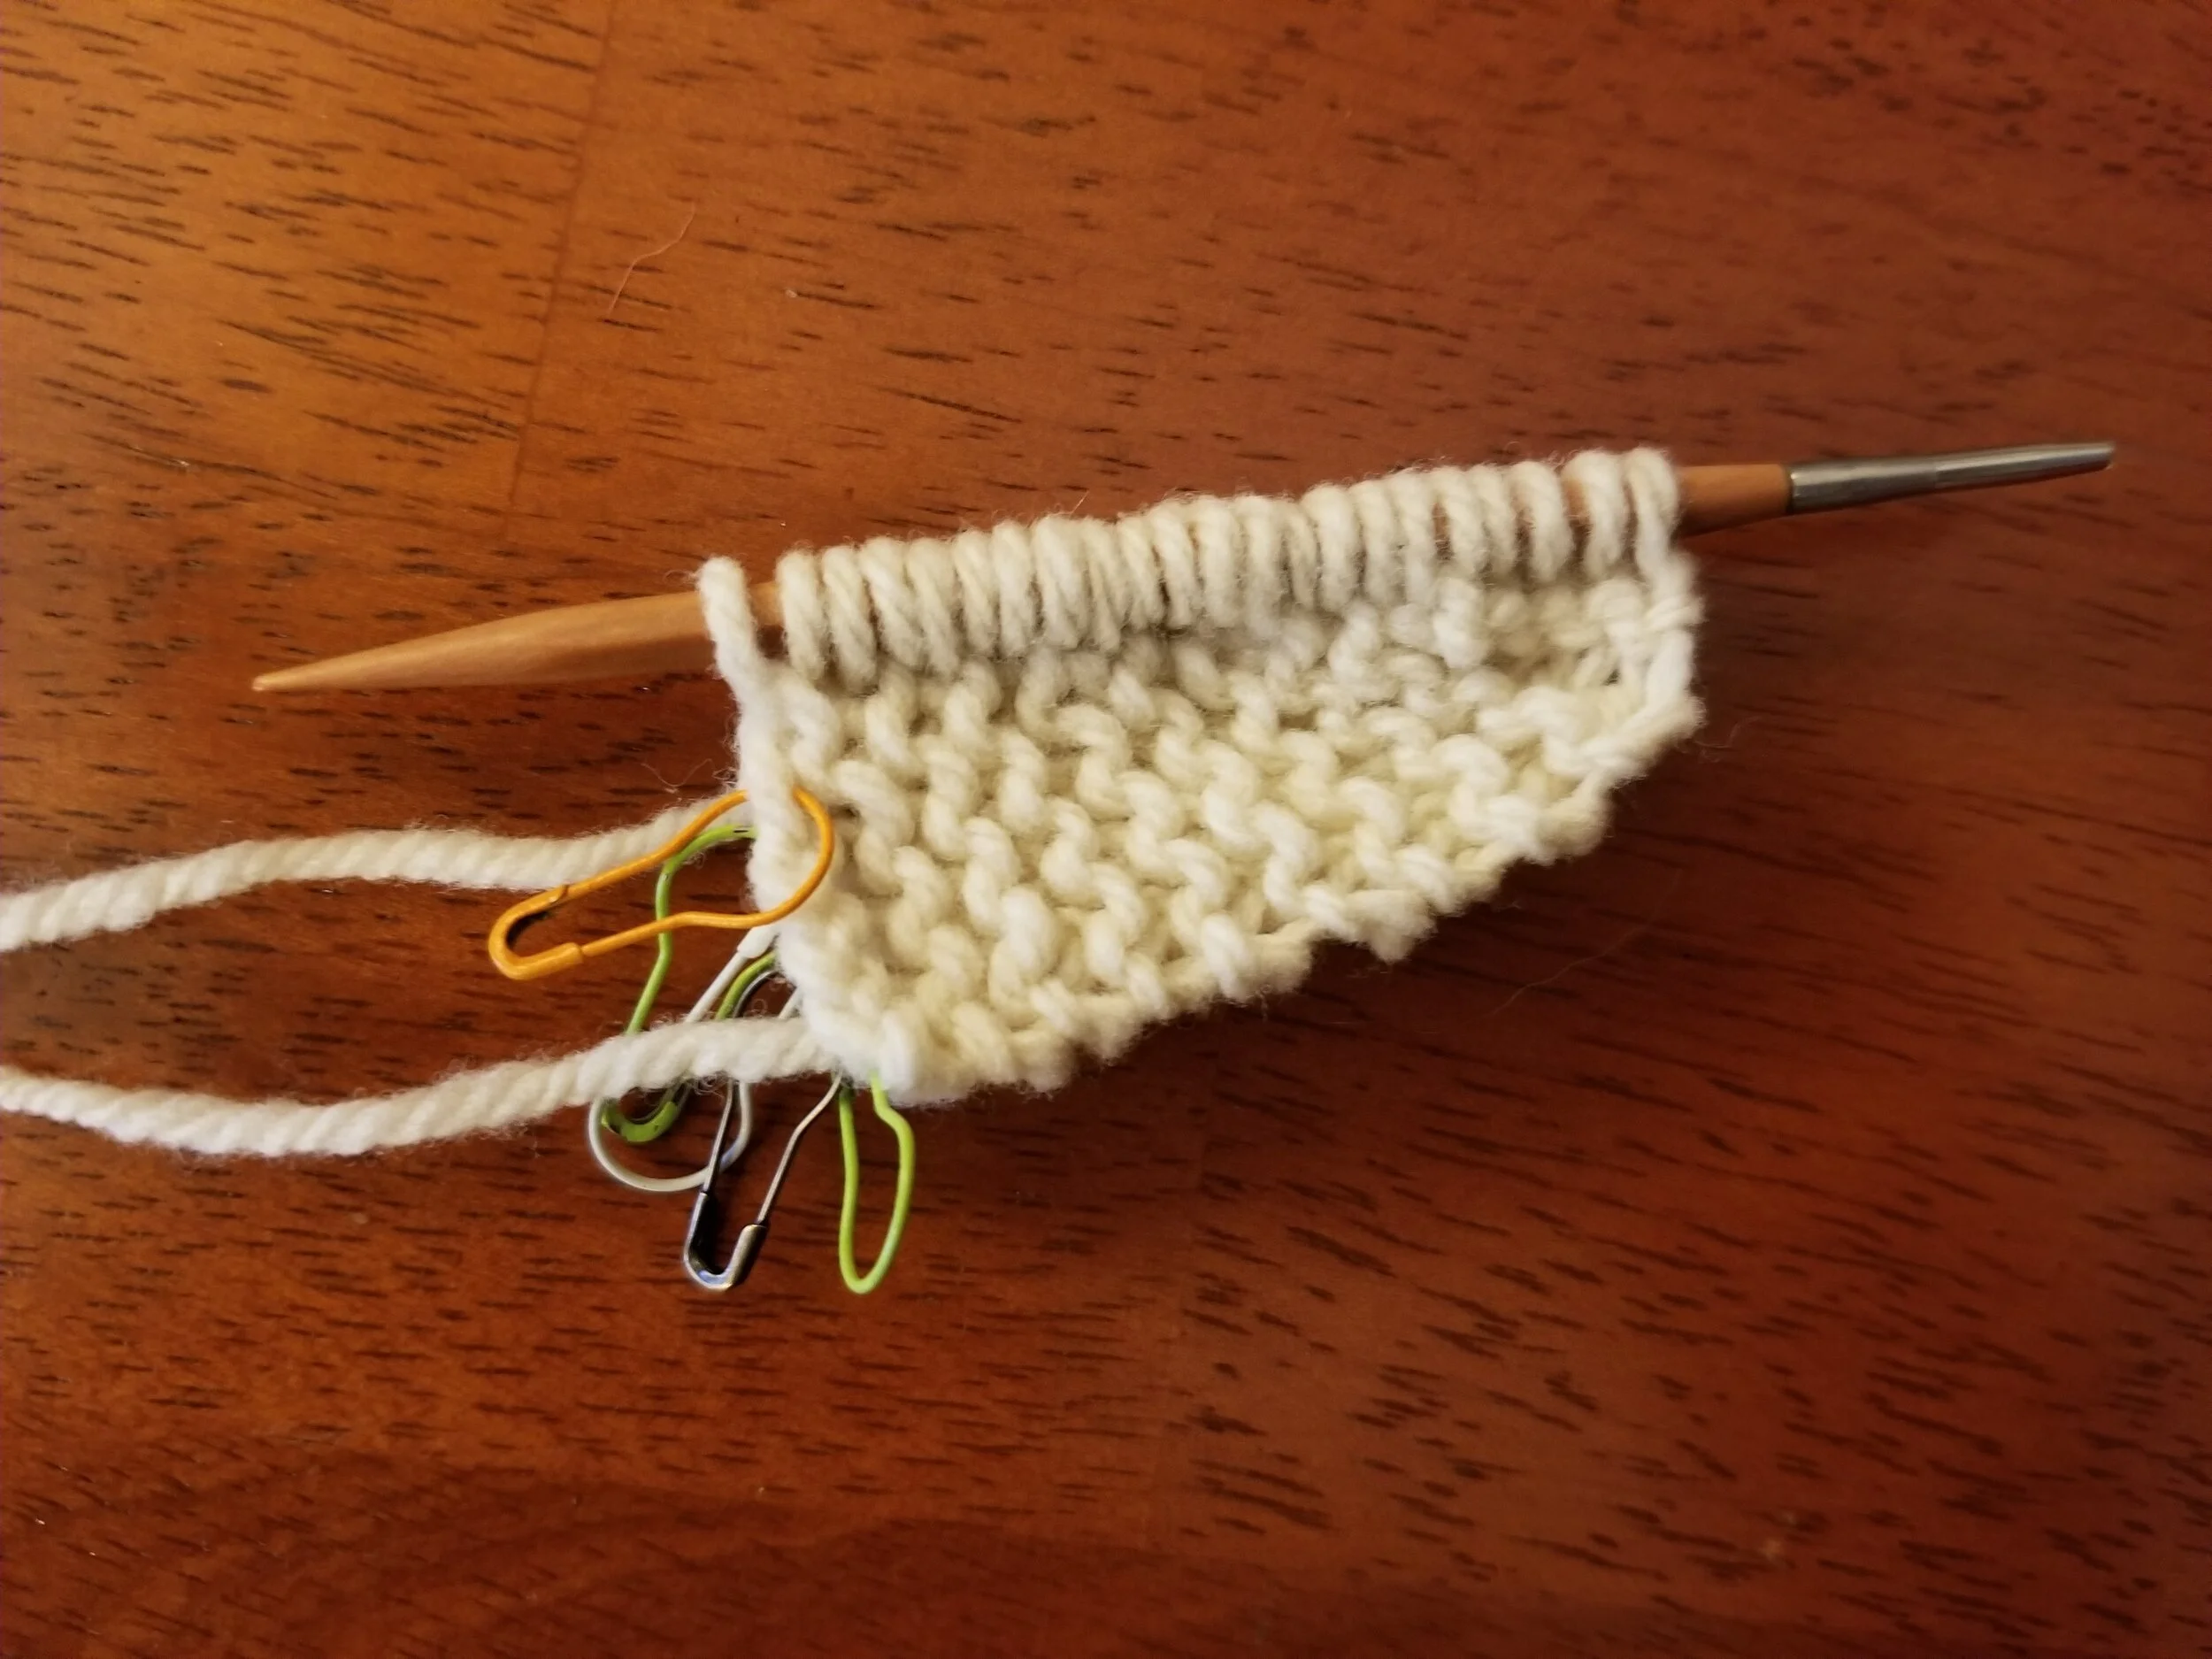
At this point mark the right side of your shawl. Even numbered rows are right side rows.
The Even Rows paragraph might be clearer with the following additions:
“Knit the 5 edge stitches to 1st marker, SM, yo, knit all stitches up to 2nd marker, yo right before 2nd marker, SM, knit 17 center stitches to 3rd marker, SM, yo, knit all stitches up to 4th marker, yo before 4th marker, SM, knit 5 edge stitches.” This helps to keep your yos in the right section of your shawl.
Highlight the ‘continue increases throughout the rest of the pattern’ instruction!
Shoulder shaping increases
It would be clearer if this first sentence read “1st shoulder shaping increase row”. The same applies with the 2nd and 3rd shoulder shaping increase rows.
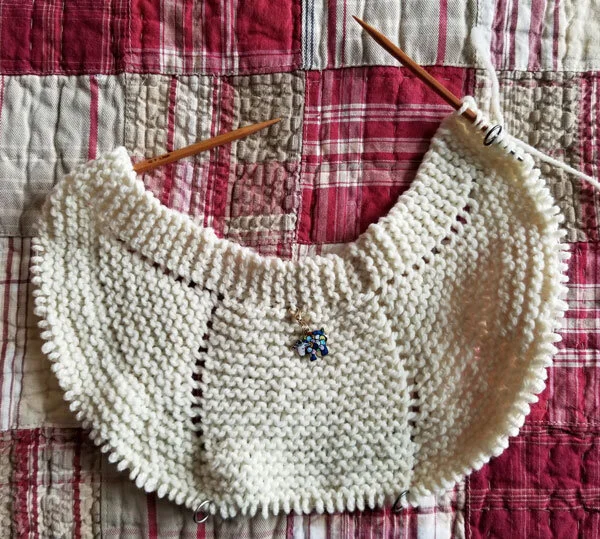
You can see the wings and center gusset taking shape. This is a few rows after the first shoulder shaping increase row.
Remember to continue the 4 yos on the ‘wings’ while you’re on the increase rows!
On the first increase row *K2, increase* and repeat across the row. I knitted 2 stitches after my yo before my first increase.
One way of increasing is K2, M1. Most patterns call for a M1L in this instance. Whatever you do, make it consistent! You could also K2, Kfb but that will add a purl bump and will be more obvious. Another way is to K2 and do a Left Lifted Increase. It’s up to you!
On the second increase row you will *K4, increase*, and repeat across the row.
On the third increase row you will *K5, increase*, and repeat across the row.
Once you get started, the pattern just flows but I felt it needed a bit of tweaking. I hope these notes are helpful!
Please feel free to email any questions to events@mysisterknits.com or post them to our Facebook KAL group!